
|
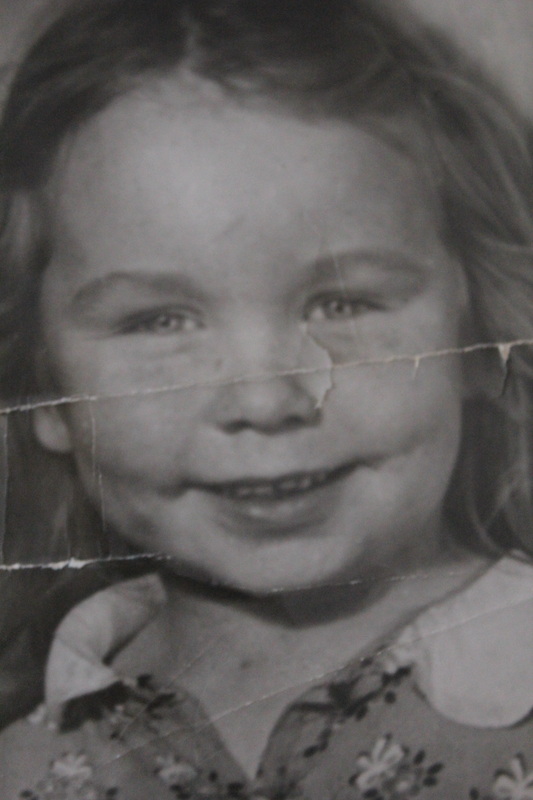
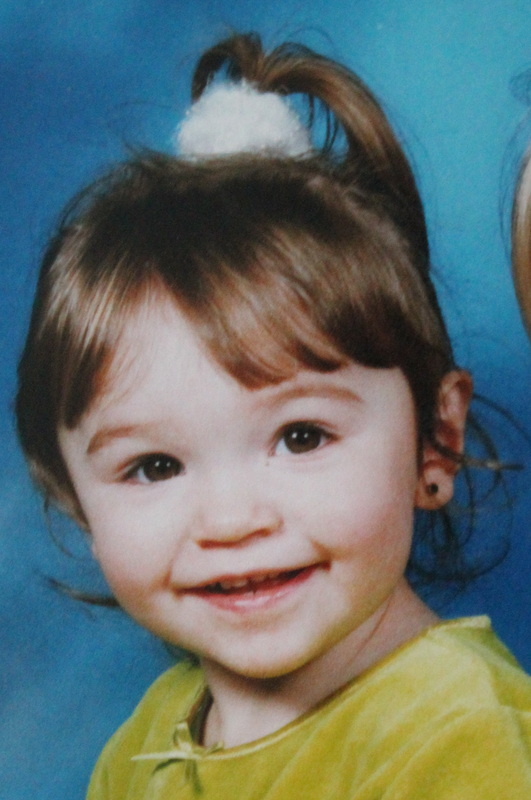
Combining portrait images.This is an example of combining/merging images together, to create this picture i used photo shop. I have decided to combine/merge pictures to show contrast (old to new), so for this idea i decided to get pictures of me when i was younger, then combine it in to a picture of my nan when she was ruffly the same age. These are the original pictures.
|
|
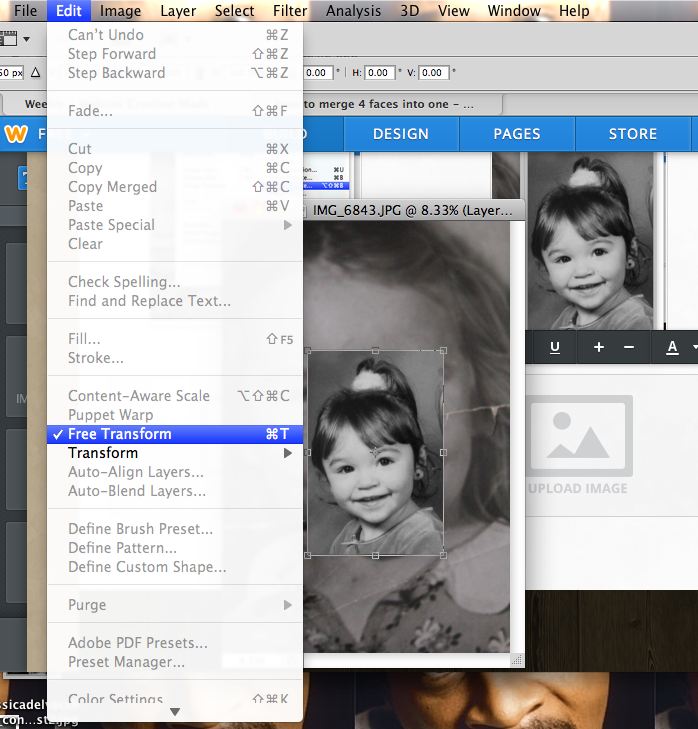
To create this image i used a range of different techniques on photo shop, first i open both of these files in to photoshop, then i dragged the picture of me on top of my nan's picture so that it would create to 2 layers in one file , making sure my nan was the background picture.
|

|

|

|

|
After creating two layers, i edit my picture so that it was monochrome the same as my nan, this would give the effect of looking old. |
|

|

|
Now i wonted to get the scale of the images the same, to do this i went to edit , then clicked on free transform, then by holding down shift it constrain the proportions. Also as i was making the scale of the picture the same as my background picture i lowered the opacity so that the my image faded and i could see the background. this allowed me to get it to perfect scale.
|
|
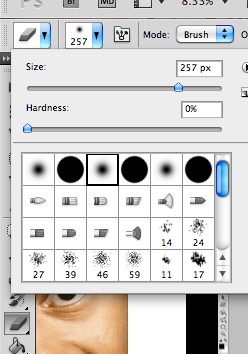
Then using an erase tool on layer 1 , making sure the erase tool was soft not sharp edged.
Ad you can see this erases the top image so that the background shows through. Also i made sure that the opacity was on ruffly 60- 75% so that it was softer and blended, also by lowering the the opacity it shown the old fold marks in the background picture allow it to look old and tarnished it like how it created this effect. |
|

|
Final image!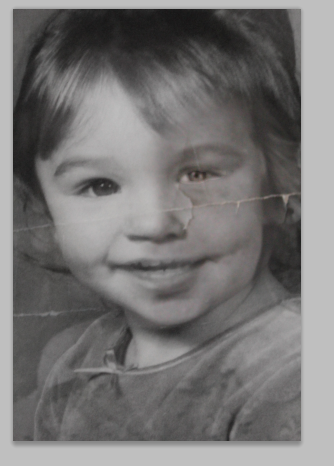
|
|
|

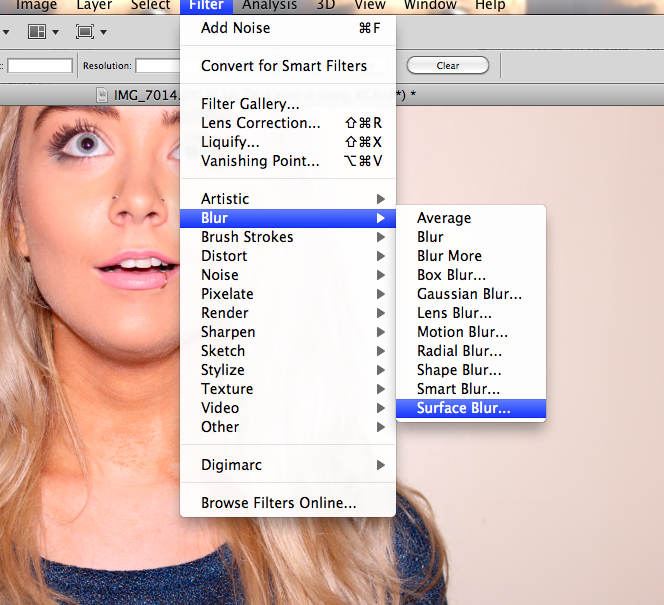
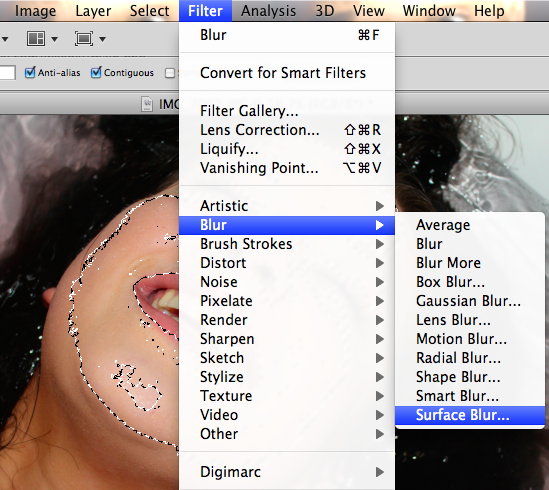
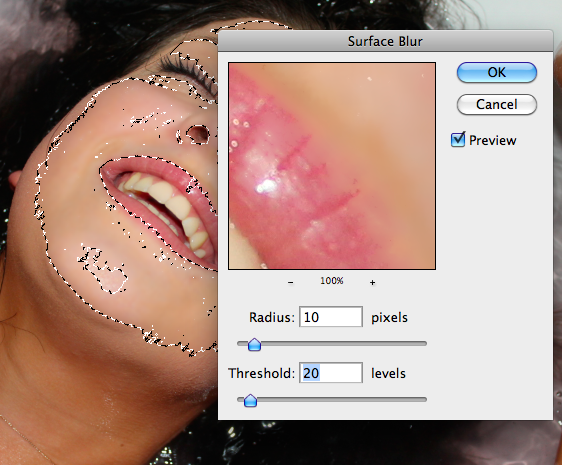
Then i coped the layers , making sure all the editing was done on the copied layer, then i went to filter then highlight blur then clicked on surface blur, after i clicked surface blur i box should appear , and i change my radius to 10 and the threshold to 20 ,this varies on how blur/airbrushed you wont your picture.
|
|

|
I then moved the copy layer underneath the first layer, then using the erase tool i started erase the top layer (layer 0) so that it would reveal the copied layer underneath (edited /airbrushed) on the right hand side.
|
|

|
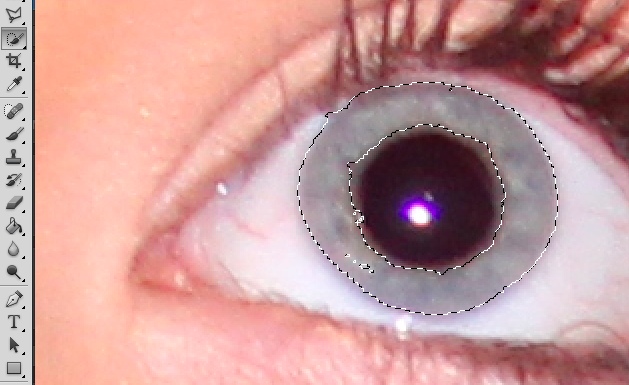
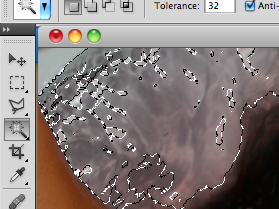
Using the magic wand tool i selected the colour apart of the eye, because the magic tool was selected i bit out of the center of the eye i used the quick selection tool and pressing alt i click on the parts i didn't wont and it got rid of the parts that where highlighted with the magic tool making a prefect selection.
|
|

|

|
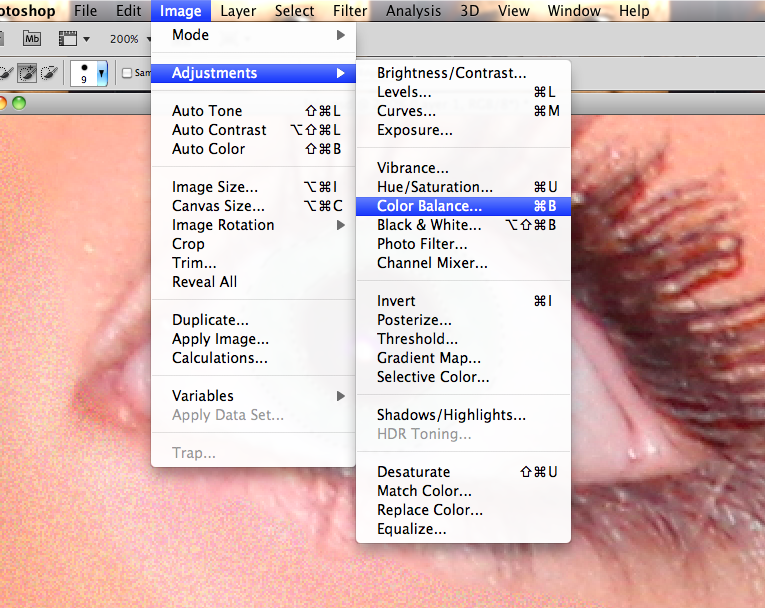
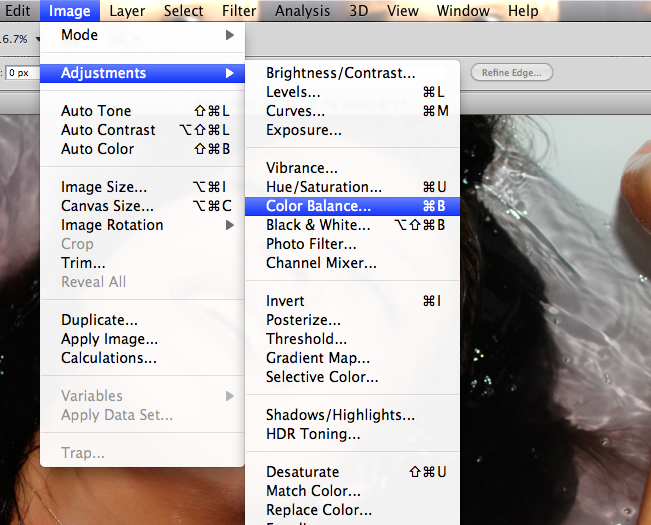
when i selected the coloured part of the eye, i clicked on image then highlighted adjustments then clicked on colour balance , then i started to play around with the greens and blues to see which colour i liked best, then after i clicked on brightness / contrast and made it look brighter so the colour's would stand out, then i feathered the middle part of the eyes edges so that it would blend and not look block , making it look more natarual.
|
Experimenting
|
|
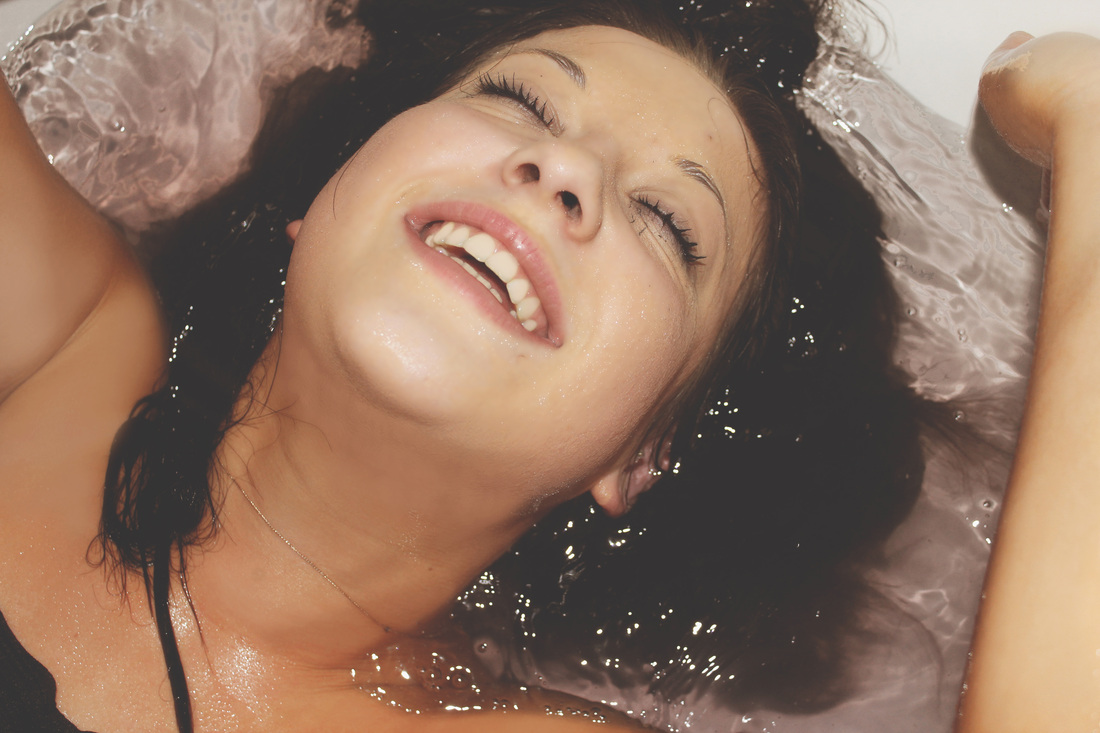
This picture was edit just to experiment with different tool and techniques in photo-shop, i am really please with what i have produced and the techniques i use. Below is the original image before i edited in photoshop.
|

|

|
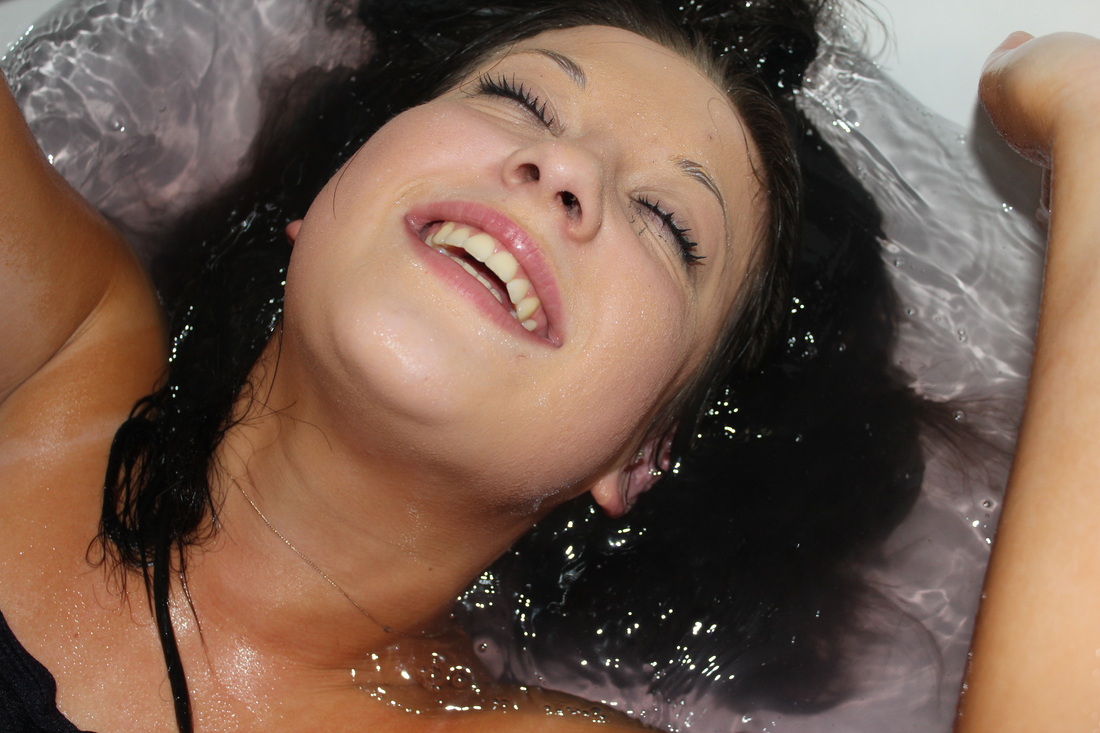
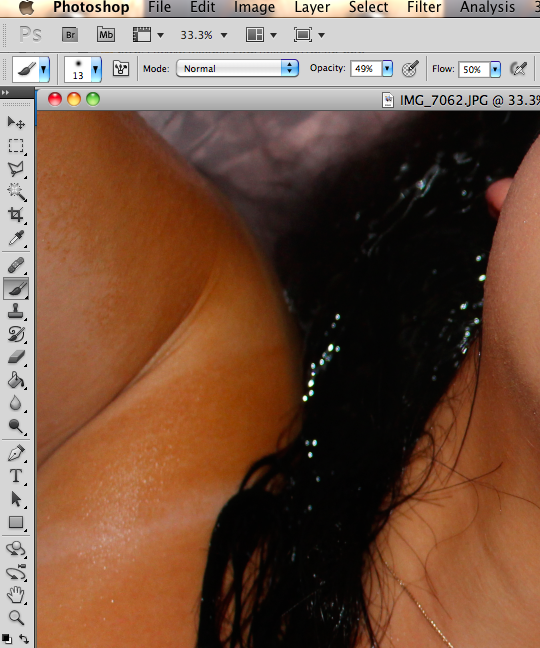
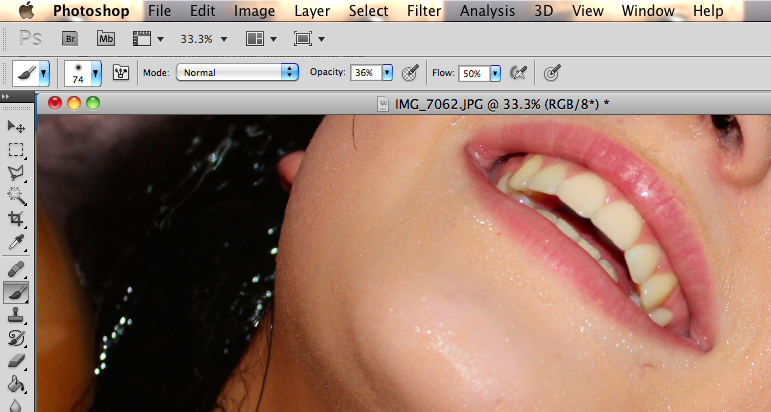
first i zoomed in to the bits of skin that look dark and patchy, i used the brush tool to make the skin look like a even and lighter tone, by clicking on the brush tool then placing it over area in which colour you wont , i then press i which selected the skin colour, then started to blend the tones together and also making them light by selecting lighter tones, also making sure that the opacity wasn't to high so that i wouldn't make the colour to strong on the skin, i did this process to the arms and the neck, changing the opacity higher and lower in darker or lower parts of the skin, also i used the same process on the teeth to whiten them i selected the bright part of the chin to do this, because there was no natural white tones with in the pictures.
|
|
After i had decided to air brush the face slightly, so using the magic tool i selected the face, then went to filter blur, then blur surface, making sure that the radius was 10 and the threshole was 20 so that it wouldn't look to airbrushed.
|

|
|
|
|
|
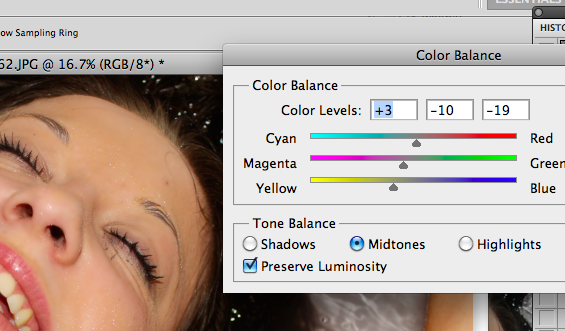
i wonted my image to look like a sort of pastel colour, so i went into imagine then click on adjustments then on to colour balance then started to play around with the colour's until i got a kinda pinky yellowy tone.
|
|
|
|
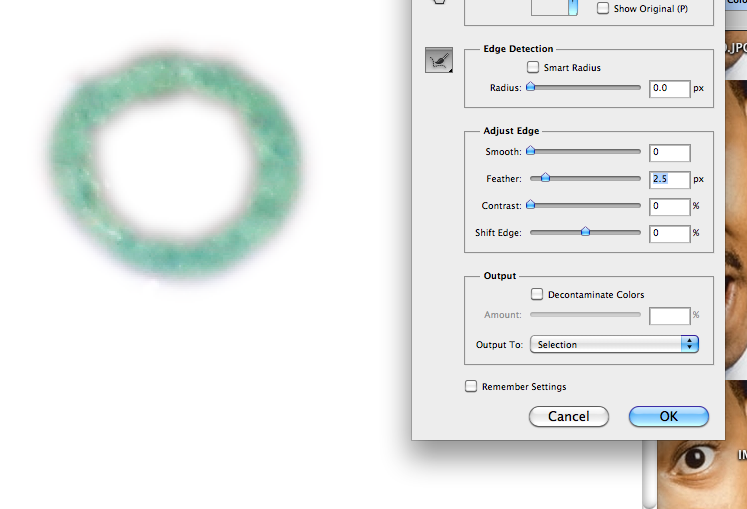
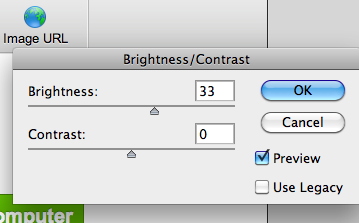
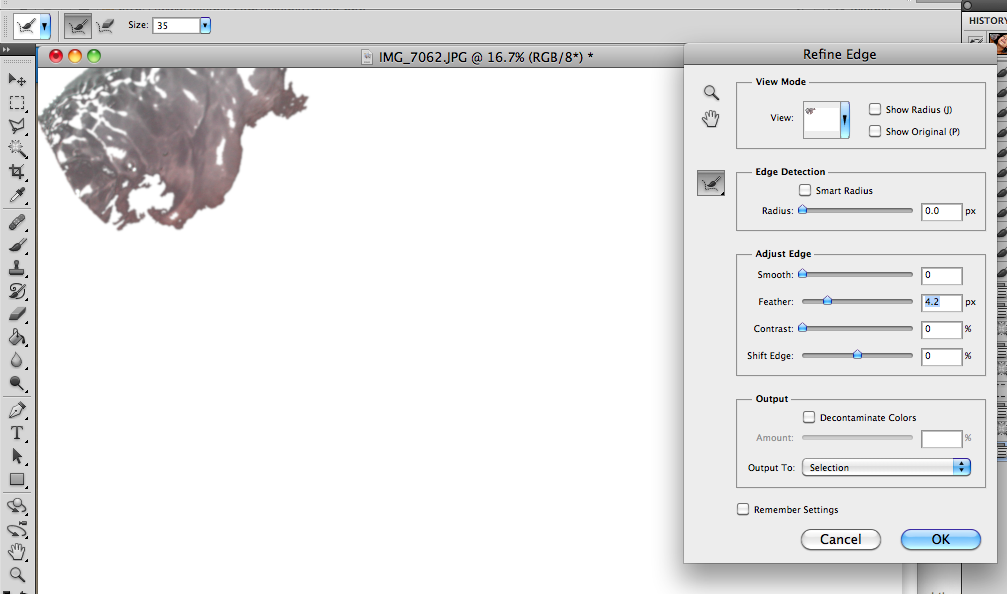
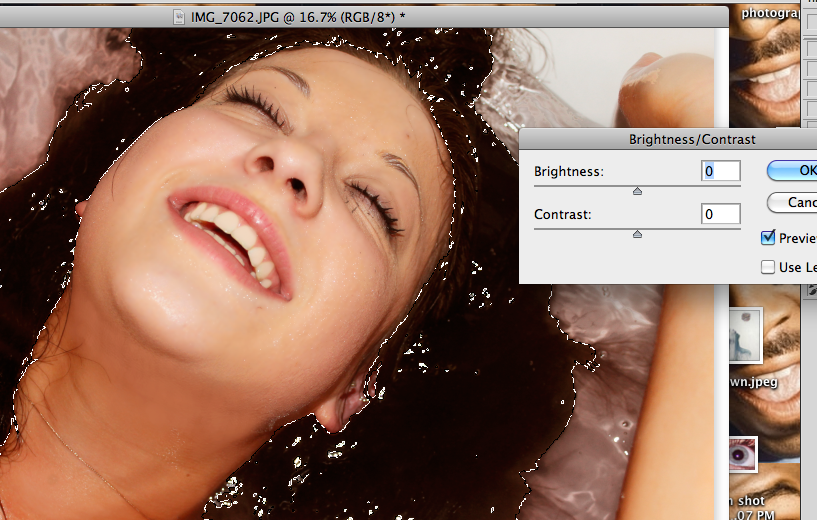
I wonted the water to be lighter so selected part of the water the went to adjustments then brightness/contrast and made the brightness 33, i did the water in different sections at the time so that it didn't highlight the face at any point. but before i deselected the water i click on refine edges then feather it so that it blended .
|
|

|
|
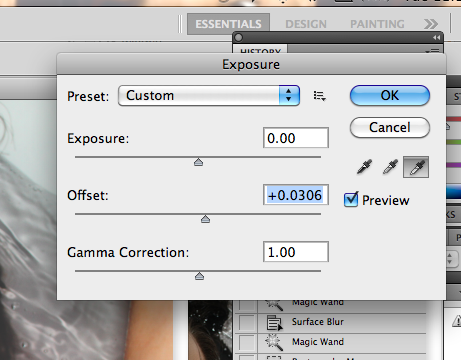
i used the same technique that i did with the water to slightly brighten the hair, then i wonted the picture to be slightly over expose, so i went to image then highlighted adjustments and then clicked on exposure then i increased the offset so that the picture became slightly over exposed
|
